Home Printer Q & A

printing from home part ii besotted blog

We received a lot of emails wanting more questions answered on the home printing front, we thought it’d be easier to answer them here than individually. If you have more questions let us know and we’ll try to add the answers to this post. Below are some of the most asked questions on home printing:

What home printer can I print heavier cardstock with?

This is not an easy one to answer, most home printers are not made to handle heavier than 120# cardstock. I have had the most success with printers that load paper/cardstock upright in the back, you can feed the cardstock through. When I had my very first Etsy stationery company, I would painstakingly do this one card at a time, it was torture!  Another printer that has a completely different finish (uses wax for the inks) and supposedly can take heavier stock is the Xerox Phaser. The finish is very unique and not for everyone, I liked it even though I prefer a matte finish, it’s definitely worth getting a sample print from the company. I worked with a small invite company that loved hers and used heavier stocks through her Phaser. For extra heavy stock I would suggest paper mounting, but that would be a topic for another post!

What printer can I use to print on fabric?

Again, I would suggest a printer that is loaded upright in the back. There’s so many ways to do this but Karen from the Graphics Fairy has an excellent tutorial!

Even with my screen calibrated my prints come out different, how can I fix this?

If you calibrated and set up the color profiles and still no luck–test print, test print, test print (in smaller versions of your original)! Michelle had addressed this briefly here. When I was trying to match colors for my stationery company I would print various boxes of the color in different tones to see how my printer would print and choose the one closest to my vision (which may have looked completely different on screen). Yes, printing at home has it’s pros (control) but some of the cons can make you pull your hair out (no control).

I want to print on shipping tags or other things that aren’t a standard paper size, how can I do that?

When I want to print on something that is not a typical size I will use artist tape (it doesn’t rip your paper when you remove it) to tape down my item that I intend to print onto a standard letter size paper and then run it through. The BEST tutorial on this is by Catherine of Design Editor and you can find it here, it’s a printing game changer!

Want to print on more atypical items? Here’s a small list:

Print on paper napkins

Print on ribbon

//RESOURCES//

Back loading printers-inexpensive, moderate, expensive (pro)

Xerox Phaser solid ink printer

Artist tape


The Mega List of How-to Digitize Your Lettering Tutorials


how to digitize your hand lettering via besotted blog

This seems to be the most requested tutorial here, I understand the desire especially if you have been dipping your toes in the hand lettering pool and now want to be able to showcase your work to the world! I hope I have rounded up enough tutorials to thoroughly get you through this process. Some of these tutorials will be step-by-step, others videos, of course some may be better than others but they all have great information to glean and I hope you find this post to be a useful future resource. If you have any questions please let us know!

//FREE DIGITIZING LETTERING TUTORIALS//

Hand lettering from pencil sketch to digital graphic

Making your lettering into a vector graphic

 Making your lettering available for web*

A beginner’s guide to spiffing up your hand lettering

Using the calligraphic brush to create decorative type

Hand lettering in Illustrator (this is great for learning about the Wacom tablet settings)

How to digitize brush or hand lettering

How to digitize your calligraphy

*Note her tutorial reads to save as a ‘gif’, but I always save as either a .png or .jpeg for web unless the graphic is animated then I use the .gif file format

//PAID DIGITIZING LETTERING CLASSES/TUTORIALS//

Photoshop for Lettering Artists (our super newbie class)

Digitizing your calligraphy with Molly Suber Thorpe

Introduction to the Wacom tablet

How to turn your handlettering into vectors

Digitizing hand lettering: creating organic and precise vectors

Lettering II by Mary Kate McDevitt

//RESOURCES/TOOLS//

These are some of the tools that you will need or read about in the tutorials that will help make your digitizing life a whole lot easier.

Adobe Photoshop or Adobe Photoshop Elements

Adobe Illustrator

Wacom tablet (there’s entry level versions that are affordable)

Scanner

Lettering Supplies

P.S. That awesome font ‘lettering’ is in is available here

Author / Miss Tristan B

Miss Tristan B. is the proprietress of Besotted Brand and one of the writer’s of this delightful blog. She lives in sunny Seattle with her handsome husband, wonderful baby girl and two pups. Her lofty goal here is to make this a creative resource repository and to inspire you to fall truly, madly, deeply in love with your life.

DIY FLORAL ARRANGEMENT WITH MCKENZIE POWELL

Mckenzie Powell Design besotted blog i

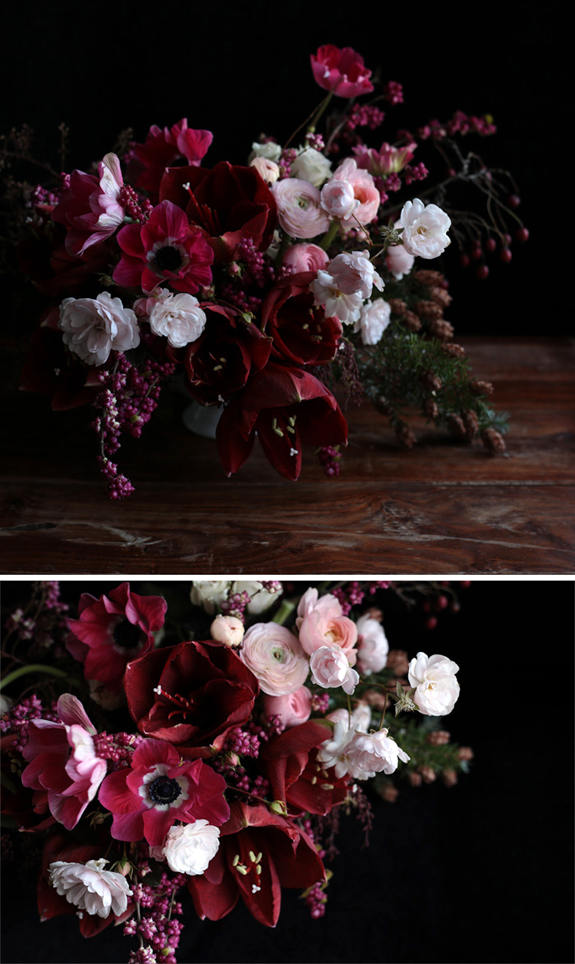
It’s a new year and a new you, better than ever!  Let’s make this a year of learning, expanding your creative skill set and enhancing your life, are you with me?  Have you ever considered trying your hand at a floral arrangement? A thoughtful arrangement can be pulled together fairly quickly, is appreciated by just about everyone, and  there is zero commitment needed if the recipient isn’t head over heels for your thoughtfully chosen florals (silly them). Floral design really is an art, so we thought it best to consult an expert to find out the best way to approach building a small arrangement.

If you aren’t already familiar with McKenzie of McKenzie Powell Designs, she is a premier floral & event designer based here in Seattle (she designs for destination events as well). McKenzie’s florals feel simultaneously lush & organic, appearing effortless but in reality, every detail is carefully considered. We are head over heels for her work (and her), and are certain you will be too!

Read More

STAMPING PERFECTLY ON COTTON BAGS

stamping on cotton bags besotted blog

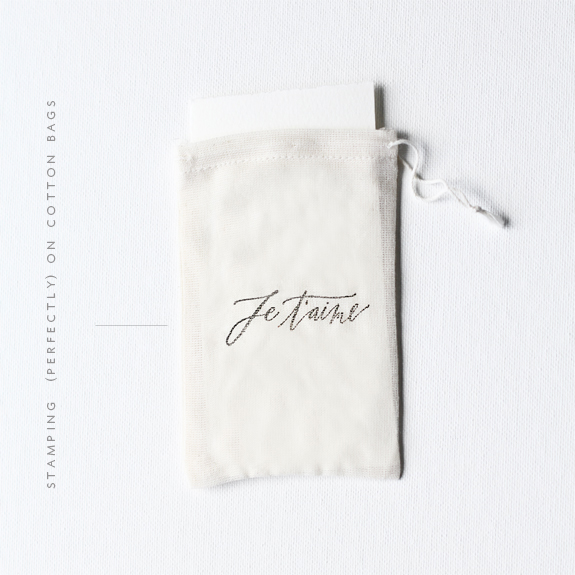
Technically you could use my technique to stamp on most fabrics, but for the purpose of this tutorial I will focus on the cotton drawstring bags since this is the fabric I most stamp on in my day-to-day fabric stamping adventures.  Also, with the holidays upon us I think the fabric bags make a great alternative to packaging that will be thrown by the wayside.  These bags tend to be thin and wrinkle quite easily so I always iron prior to stamping as you want to have as flat a surface as possible.  Stamping is not as forgiving as other printing techniques and you do want your substrate (what you are stamping on) as smooth as possible so start with ironed fabric without a lot of texture (so nothing nubby, ribbed, raised, furry, etc.)  My most secret of tools for ironing these tiny bags quickly and without dragging out my ironing board and iron is an old hair straightener, yes a hair straightener.  You don’t need a fancy one, just a cheapy that heats up to a nice temp (mine goes as high as 450 f) that will actually iron out your wrinkles;  I just clamp down on one end and pull it through the iron and it is perfect every time!  The iron is now dedicated for crafting, which I would suggest for yours as well.  Once you have a nice ironed bag you will want to put a piece of thick + stiff cardstock in it.  This serves two purposes 1) it makes for a nice stiff surface to stamp on and 2) it will prevent the ink from bleeding to the other side. I just cut down a piece of scrap cardstock to size and use it over and over (if there’s no ink that has seeped through).Read More

HOW-TO (PROPERLY) CLEAN YOUR RED RUBBER STAMPS

how-to clean your rubberstamps besotted blog

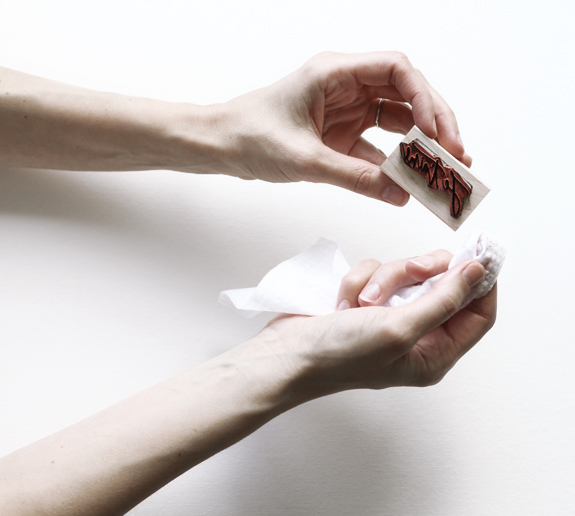
I have tried many different methods of cleaning my red rubberstamps and the one above is the easiest, fastest and the least amount of mess.  My secret? I use an unscented baby wipe! It must be unscented as fragrance will deteriorate your stamp and it must be a baby wipe, as anti-bacterial type wipes or other cleaning wipes have solvents that again break down your red rubber which is a natural substance. The baby wipes have glycerin in them which not only cleans the stamp but conditions it as well. The baby wipes work really well to clean multiple types of ink but I mainly stick to pigment inks since it has such a large range of what you can stamp on. The trick here is to dab at your stamp rather than rubbing your wipe side-to-side, you want to avoid leaving any fibers on the stamp surface which could effect your future stamping endeavors. If you want to keep your stamps like new (which will result in a better stamped impression) clean them after every use, with the wipes this makes this once cumbersome task pretty effortless!

Let me know if you have any questions or if you have another way that you think might be better.  Oh, and I don’t know how this would work on clear stamps, they are made of polymer so I think it would be a trial and error situation, possibly more error. Next week I will go over how to stamp on cloth, some tricks I have learned along the way!

P.S. Looking for a little Inspiration Rx? It will be up later today!

P.P.S. Special thanks again to my model Michelle for her patience and pro skills!

Author / Miss Tristan B

Miss Tristan B. is the proprietress of Besotted Brand and the writer of this delightful blog. She recently re-located to sunny Seattle with her handsome husband and two pups, they are expecting a baby girl in December (possibly November). Her lofty goal here is to make this a creative resource repository and to inspire you to fall truly, madly, deeply in love with your life.