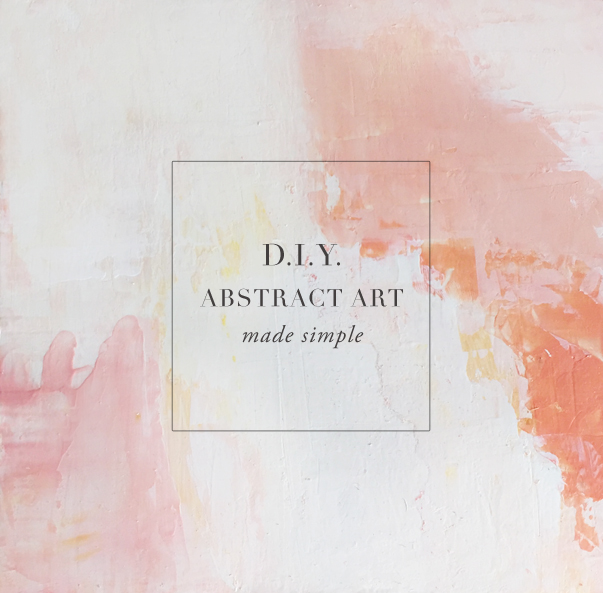
I have been wanting to try my hand at an abstract art piece using acrylic paints for some time, but felt overwhelmed on where to start. I did have some supplies on hand, I was gifted a small acrylic tube set 3 years that sat unopened (more on that later), I had some craft paint, a wood cradled art board and heap of indecision. Where the heck does one even begin to start? If you have wanted to do this and are feeling the same way I was, I hope that this little resource and tip post will help you make the move to get started-DIY abstract art made simple!
So where did I start? I found a few DIY’s, but being me, I don’t always ‘get’ it the first time (or second or 3rd). I then found a few online classes and that helped me have a few light bulb moments BUT the single most important moment for me was the realization that if I hated my painting, I could just paint over it and build more ‘texture’ in the process, it made the whole intimidating process so much more accessible. So this is how I did it!
ABSTRACT ART MADE SIMPLE | STEP-BY-STEP
-I pulled out my wood artboard and taped the sides with painters tape (I knew I wanted the finished piece to have the exposed birch wood sides)
-I found a few palette ideas I liked on Pinterest, I have a whole board for blush, peachy and nudes so plenty of palette muse there! I am a bit of a color-phobe, so my palette was very limited-2 whites, a dark umber brown (almost black), ochre, a deep orange that was blended into a dark peach and a sheer pink.
-In hindsight, I should have gessoed my board (this is just a way to prime your board for painting), but I just painted a couple coats of white acrylic on the wood and let dry.
-I started with ONE color at a time over my white surface. I squeezed a dollop of color and used a credit card (you could use an old library card, a palette knife, etc.) and I started to ‘scrape/paint’ with the card to create texture and ‘strokes’ (I deliberately tried to avoid too straight of edges, but if you wanted that look go for it). I would wait for the color to dry if I wanted just that one color, if I wanted colors to blend with each other I wouldn’t let them dry completely before adding other colors on top of the existing colors.
-After I laid down several colors and let them dry, I would add a wash of white over the painting, again with the credit card. Since the credit card method is a little unpredictable I would have some spots where I would press too hard and color from underneath would be revealed (I loved this!).
-I worked for a week in between toddler naps, in 10-15 minute increments which may seem like FOREVER to someone as impatient as myself but this allowed me to step back and assess my work and where I was going. Also, it prevented me from rushing the white washes and just creating a muddled mess!
-I could have kept going, but at some point I wanted my kitchen countertop back so I stopped myself. I am super happy with the results and I can’t wait to try a larger piece and some backdrops for our photography!
In conclusion, I LOVED this project, it wasn’t the fastest to come together, besides the mess of acrylics, it was a pretty easy going and relaxed DIY. Please feel free to leave any questions in the comments, I’d be happy to answer them!
P.S. For those people that think a project like this may take a sale away from a ‘real’ artist, I am going to put my 2 cents in here and say this–maybe YOU dear reader are a ‘real’ artist and don’t know it yet, maybe a DIY like this is the key to opening up a whole new world of exploration for you and maybe you’ll find yourself a new career path or a new hobby or just make yourself a beautiful piece of artwork that you can be proud of. To everyone that just wants to be creative hats off to you!
//DIY ABSTRACT ART MADE SIMPLE |RESOURCES//
CLASSES
Large abstract with a credit card
Acrylic paint series with Lisa Solomon (this is super in depth, you don’t need this for this project but good if you want to keep going with this)
TUTORIALS
Easy Abstract Art step-by step
Super simple abstract art tutorial
An working artists shares his techniques
SUPPLIES
Gesso (for priming your art surface)
Acrylic paints student grade (if your supplies aren’t too precious it’s more likely to be used more freely)
Acrylic paints professional grade
Acrylic tubes used in piece (I used these) they are beautiful but super transparent and probably not made for large scale painting (but fun!)
Wood art board (these are awesome because you can just hang when you are finished, no additional framing needed: small / large
Pre-primed wood art panels (a large panel 36″ x 38″ is only $125USD!)
Miss Tristan B. is the co-creator of the world’s best + easiest product photography editing tool-Foto Rx | Shopkeeper’s Helper and one of the writer’s of this delightful blog. Her lofty goal here is to make this a creative resource repository and to inspire you to fall truly, madly, deeply in love with your life.


Love love love your post!!! Apparently I have an itch for this that I’m dying to scratch ;) And love your painting too! Thank for this
Hello Sofia! We hope you try it, it’s super relaxing and very satisfying when you have a completed piece! Thank you for the kind words!
Wow your piece turned out amazing! I have been wanting to try this for so long – thanks for the resources and encouragement!!
Hello Rachel! Thank you for the visit, nice to ‘see’ you:) and the compliment is so well received, I am pleasantly pleased with the results (and I usually hate everything I do). I say go for it, start on a smaller piece to get a hang of the technique and then get super GIANT!
Love this! The palette is stunning.
Thank you Jess! It’s really one of my first forays into color mixing, not my strong point. Michelle believes that’s the best part, lol.