AMY BORRELL

I love this piece by Illustrator Amy Borrell, the palette is exquisite but it’s the lettering that had me at hello.  Look at that ‘B’, it’s so cheerful and floaty, like a champagne bubble of ‘B’s.  It’s apparent that she is loaded with both talent and keen wit and I think you should leave me now to pay her portfolio a visit as it will delight your eyeballs to no end. Visit Amy’s site Cake with Giants or buy some of her amazing prints at her shop with the same sweet name!

PRODUCT + BLOG PHOTOGRAPHY::LOW LIGHT? NO LIGHT? NO PROBLEM!

I have had a tidal wave of desperate emails recently that I wish I could answer one-by-one, but my time is limited at the moment because of holiday madness/goodness.  The pleas are about shooting products or images for their shops or blogs when the days are shorter and darker.  How? And please help are the cries.  I asked my co-professor Michelle P. if I could re-print this tutorial that we featured in our Food + Foto class, I hope this helps, let me know if you have any questions! And for the record all the recent D.I.Y. photos on the blog have been shot in the middle of the night!
I know a lot of you have asked about shooting at night and have been afraid of not having available light when you finally have a free moment to shoot. I am hoping this little behind the scenes opens a new shooting-op for you!  I used to be a natural light snob, but then I got a job where I worked from sun up to sun down (and then some). If I wanted to shoot (and I really, really did) I had to change this natural light only thought process and just embrace ‘light’ in all its many facets. That is why I saved up some extra dough and bought myself the Lowel Ego light set.  I did buy the set with two lights, but ended up giving one away (I still regret that decision).  This little light is perfect for tabletop photography and allows me to get beautiful natural looking light at any time of day. The samples below were shot in a complete black room, at night with only the above set up. The reflector set up above is not so much to add light to my set but to be able to manipulate the light within it.  I use the reflector to move where my highlight will be more pronounced or to cut down on a glare, etc.
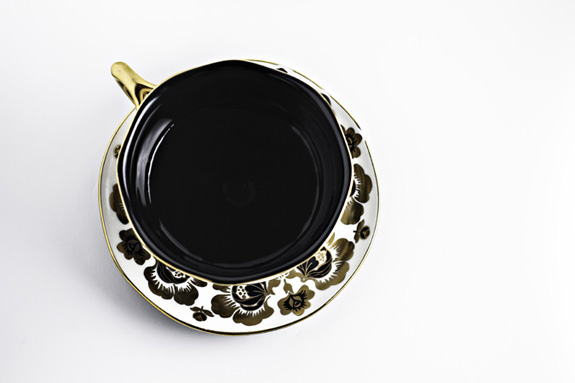
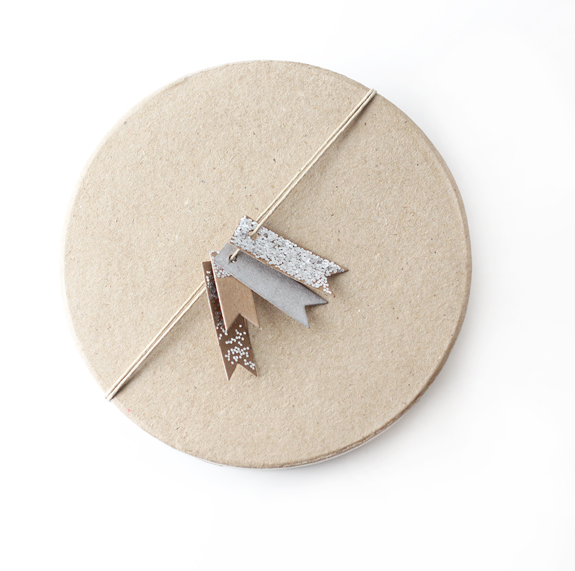
50mm | f/ 4.5 | 1/160 | iso 400. Below in the first photograph you can see that my iso was set at 400, not too high and my aperture was not open too wide so I could ensure detail. Would you believe this was shot in the middle of the night?

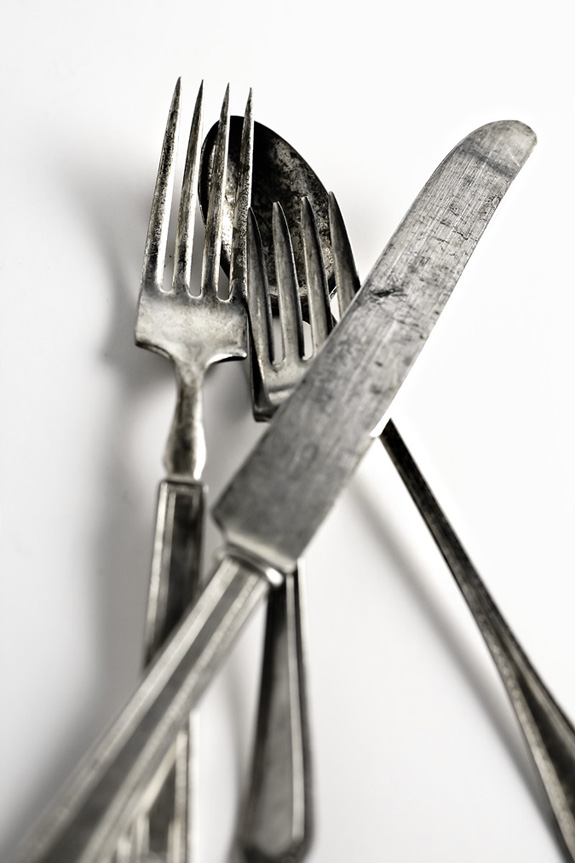
Below silverware: 50mm | f/ 4 | 1/250 | iso 400. I wanted to show that with this set-up you can manipulate the light to increase the detail on your subject just by moving your reflector at different angles. This takes practice and I feel is just a creative decision so use this tip if you like, don’t if it stresses you out.

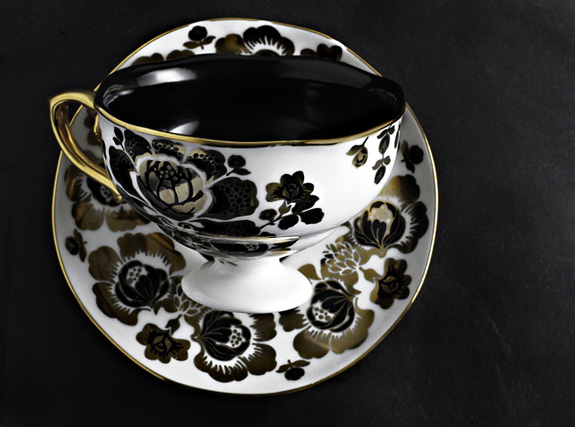
Below teacup: 50mm | f/10 | 1/60 | iso 800.  Here I wanted to show you that even in a blackened room with a dark subject + a dark background, very small aperture that with the Lowel Ego light you could get beautiful natural light results.

I hope that this post opens up more shooting options for you and you aren’t a slave to the notion of only shooting in optimal lighting conditions during only certain times of the day. In my my photographic journey I have learned to embrace all sorts of lighting conditions and really enjoy the challenge of shooting in light that I would formerly not have looked at prior. Light from the television or a computer screen? Yes, I will use it to my advantage if I think I can get a certain mood/tone from that image. I think the goal for me is to feel confident that I can shoot in any light and not ever lose a memory that I want to capture + keep.

P.S. If you shoot with your Iphone/Cameraphone the Ego lights (or whatever light set-up you choose) are really helpful since most of those types of cameras have a hard time with lowlight situations and introduce a lot of noise or blur if there isn’t enough light in the room.

NEIMAN MARCUS + TARGET

Yesterday or was it the day before?  The days are all blending together, anyways, I watched as fashionista Andrea tweeted the launch of the ‘legendary’ partnership of Neiman Marcus + Target. She tweeted photos of the long, long lines that wrapped for what seemed like miles. She tweeted women in victory poses with the last Judith Leiber clutches in their uhm, clutches. She tried on cute sweatshirts and sequin tops and gave the play-by-play on fit.  It was all very exciting, like shopping with a bestie but not having to leave your home.  Today I did leave my home, to go to where else? Target.  Not, for the partnership, my brain is currently sieve like and not retaining much, so I forgot about it way before I arrived.  I had to go for the very exciting chore of buying laundry detergent–my life here is endlessly exciting.  Target is also my closest supermarket and even though it’s nearly 20 miles round trip I had to go.  When I got there I rounded the corner and was standing in front of the display of NM goodies.  Can I tell you something?  No one had touched it!  It sat there pristine as I watched women and girls wearing tights instead of pants (for shame) walk by the display not even curious. Not even a side long glance, nada. It didn’t look like my Target received everything that was available (there were no Oscar De La Renta dog bowls), but it had a lot. I am thinking of starting a side business of buying and re-selling the items, just kidding, kinda.  I feel so bad for the merchandise but secretly can’t wait for no one to buy anything so it goes on sale and I can buy that cute blazer and the tray.  Have you seen the partnership in person?  What do you think?  It may be a little spendy for the average Target client, but for those that are familiar with the designers featured it feels like they are giving the products away, truly.

On another note, I have been listening to a podcast on my drives to Target (I go a few times a week or else I wouldn’t see anyone other than my husband, it’s nice to be around people). The podcast is different than what I usually listen to, the host is very stiff + robotic (no disrespect), but if you can get past that it’s not a bad listen while doing errands.  It’s called Skeptoid and the host debunks myths (I suppose like Mythbusters, but I have never seen that show, so maybe I am all wrong). I have listened to the episodes on the Flat Earth Society, anyone that believes this is endlessly fascinating to me, because it ‘s surreal. The Betz Mystery, which I felt the host loosened up on a tad, I almost thought the argument was going to be for alien artifact, but he swooped in and set the record straight, phew.  I also listened to the one on the Bermuda Triangle and how it got started which I had no idea was such a relatively recent myth.  Again, the host isn’t much on personality (no hyperbole from this guy), but I believe he’s completely into his debunking (he’s available for live debunking events if you have the desire + means).  If I did have the means I would totally hire him to be the entertainment at my event, why not?  What it didn’t rate on the scintillating scale it would more than make up for in originality.  Alas, I have no events to go to at the moment nor have any intention of throwing one, but if you do hire him, please invite me.

KRAFT FLAG GIFT TAGS + MINI GARLAND D.I.Y.

The other night when I was wrapping gifts I was thinking wouldn’t it be so cute (I’m all about cute), to have some kraft flag gift tags? (say that 5 time fast).  I happen to be the owner of a ton (no exaggeration) of chipboard, because as you know I love me some industrial. I started to tinker, as I have a black belt in tinkering and my flags were terribly wonky at first, then I tinkered some more and had my light bulb moment and created my template. After that I was churning out chipboard flags like my own little factory.  I even got my husband in on the action.  I like working with my hands and I LOVE problem solving, it’s the way my brain works give me a problem (albeit nothing of the arithmetic variety) and I am a happy camper; thus, my little flag factory was born. My brain started firing off, the way it does, in 40 different directions and I knew what potential these had for crafting goodness.  Just so you know, I am not a great traditional gift wrapper, do not give me a piece of wrapping paper because your gift will look like it was run over by an eighteen wheeler.  I like simple + easy.  If I can do this you can surely surpass my efforts, so without further ado here are some ideas to use these new flags in your future gifting endeavors!
I cut the notched part of my flag tag off, punched some holes + used the new mini alphabet set (san serif) to create this garland.  I want to try the mini Circus alphabet set and do some embossing next time.  The best (and my most favorite) part of stamping is that I can use any color + stamp on something this tiny.  Don’t worry, you won’t ruin the other part of your tag that is remaining, just punch a hole on either side, run some twine through and you have a very cool + modern tag for your gift!


Once you get started it’s hard to stop making these mini garlands. The chipboard takes paint very well, I used both spray paint & Martha Stewart paint with equally good results. I used double-sided tape and Elmer’s glue with the glitter (the cutest tiny sequin-esque glitter you ever did see). It was all pretty effortless, I didn’t even measure, just cut wherever longer, shorter, etc. I am going with a little imperfection is charming, right?

For this Monday morn giveaway I will be bestowing one lucky + creative individual with a set of the new chipboard flags, a mini alphabet stamp set + twine.  Just pin this, or tweet it, or leave a comment, bonus if you think you have some more creative ideas up your sleeve and want to photograph! I will announce a winner next Monday December 10, 2012.  Good luck!

CLAY TAG D.I.Y. RESOURCE

I have been slammed with the holiday rush (hooray!), but I took a few minutes yesterday to photograph some of the clay tags I made the other night. I had so much fun! It was easier than I anticipated as I have never used clay in a project before and wasn’t sure what to expect.  I tried a few different ideas I had been toying with using the Besotted Brand stamps. One was creating a faux wax seal, I think it came out better than I envisioned (disclosure, I actually didn’t think it would turn out at all). I also used the banner stamp that I customized; it reads ‘handmade with love’. This was an easy one, I just stamped it on a rolled out piece of clay and cut out with a sharp Exacto knife using the stamp border as my guide. Last one I made was using the vintage postmark stamp, I love how much detail I got out of it.  I used air dry clay, mini cookie cutters for the circles and a nail to create the holes for stringing.  It took me about 20 minutes start to finish + clean-up. I let the tags dry overnight and then used an Emory board (for your nails) to smooth out rough spots (easier for me to use than sand paper on these small objects).  I was really happy with the results and have been thinking of a ton of other ideas. The clay dries hard, but not as hard as a kiln fired object, so it is still relatively delicate in my opinion, but it does have a nice raw ceramic feel to it. Below is my supply list and clay tutorial resources.
::SUPPLIES USED::
Exacto knife (you could use a disposable butter knife)
Nail
There are a plethora of great clay tutorials/resources but these are the ones that I felt explained the process well enough so I was able to have a modicum of success.
::CLAY TUTORIALS::
Post Road Vintage D.I.Y. Clay Tags Tutorial (she even makes her own clay!)
You also don’t need to stamp on them prior if you don’t want, just make any shape flat surface (circle, square, oval, etc.), let dry and then ink + stamp on the smooth surface, the clay takes the stamp impression very well.  Let me know if you have any questions!