
Before you start thinking that as the photographer for the cover shoot, I got to boss people around for 2 days straight, you should know that in reality, every client shoot is truly a collaboration. In addition to myself, Tristan, and Sanae, we had Sanae’s Editor, and the Art Director on the team. Thankfully, they were absolutely delightful to work with, and we all shared the same goal for the shoot (creating a cover that was warm, welcoming, and true to Sanae).
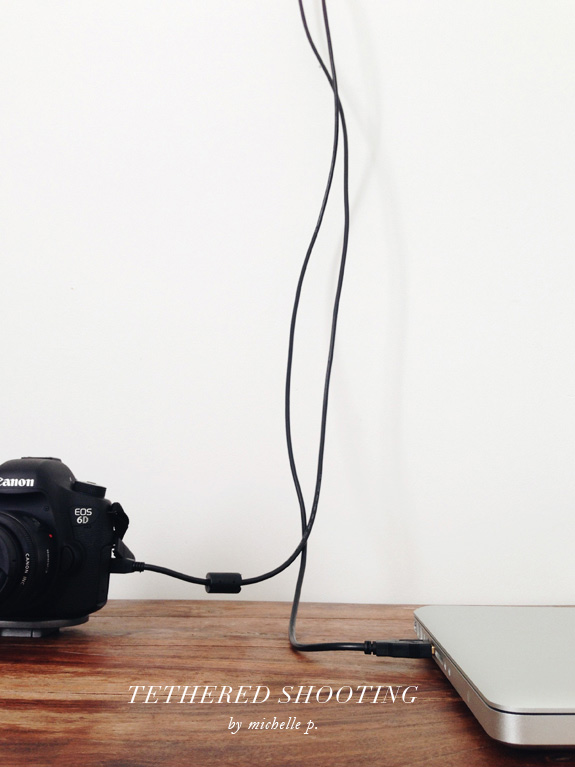
We thought you might be curious about the nuts and bolts of the image workflow while collaborating on set. Tethering the camera to a laptop was an important first step. It is far more practical to have your images pop up on a laptop screen for the group to analyze than to make everyone huddle over the tiny LCD screen on the back of your camera. Even when you are shooting solo, it’s much easier to scrutinize an image on a larger screen, and all it takes is Lightroom and a tethering cord, so why not?
Here’s how to tether through Lightroom in 5 easy steps:
1. Plug in the tethering cord to your camera & laptop.
Note: a tethering cord is just a longer version of the cord provided with your camera to upload images to your computer. I have a 15’ cord which is plenty of length for my needs, but you can get them up to 65’ long!
2. Turn on your camera. (I told you the steps were easy.)
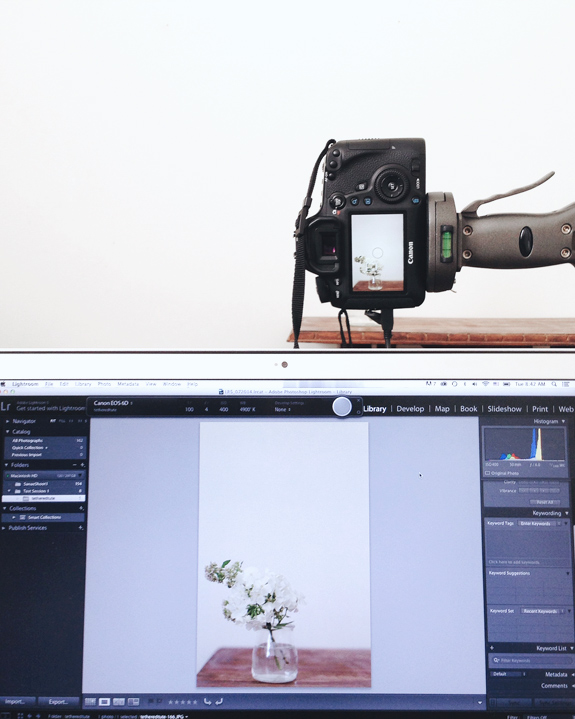
3. In Lightroom select: File > Tethered Capture > Start Tethered Capture
4. The Tethered Capture Settings window will pop up. Here you will name the session, decide how you’d like the files named, and choose a destination folder for your images. I recommend creating a project specific folder for your image destination to keep things tidy.
5. Once Lightroom detects your camera, your camera model and settings will display on a small tool bar. This bar also has a shutter release button. Meaning, if your camera is set up on a tripod or stable surface, you can snap a photo right from your laptop!
If you have any trouble, make sure the version of Lightroom you are using supports your camera model. I had to upgrade to Lightroom 5 to get support for mine.
Once we composed and captured a promising image, I took a quick screenshot of the image in Lightroom, then dragged the screenshot into our group project folder in Dropbox. This gave the Art Director instant access to the photo so she could pull it into Photoshop and mock up a cover – complete with title, subtitle, and author’s name. As you can imagine, instant feedback on what was or wasn’t working, brought tremendous value! We were able to make adjustments on the fly, and do everything we could to end up with the best possible cover image for Sanae.
On a personal note, I feel so honored to be a part of this project. It’s a joy to meet and work with people who not only have a passion for what they do, but can make a hard day of work fly by because they are fun to be around too. Also, shooting in Aran’s studio was a photographer’s dream, bright white with perfect northern light… do you think she’ll notice if I move in?
//FURTHER REFERENCES//
Lightroom Tethering Video Tutorial
Equipment Used for the Shoot
Photos above shot using VSCOCAM on an iphone 5
Miss Michelle P. is a photographer, designer and co-professor for Souvenir Foto School. She lives in the Pacific Northwest. Her muse is light.