DIY Abstract Art Made Simple!

DIY abstract art made simple via besoted blog

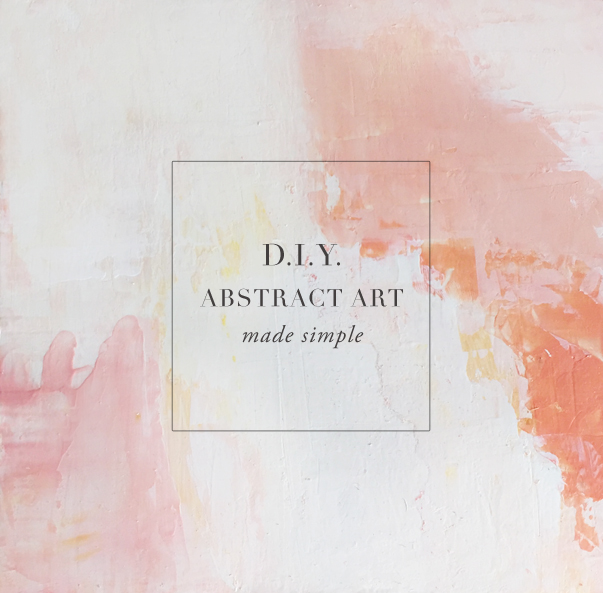
I have been wanting to try my hand at an abstract art piece using acrylic paints for some time, but felt overwhelmed on where to start. I did have some supplies on hand, I was gifted a small acrylic tube set 3 years that sat unopened (more on that later), I had some craft paint, a wood cradled art board and heap of indecision. Where the heck does one even begin to start?  If you have wanted to do this and are feeling the same way I was, I hope that this little resource and tip post will help you make the move to get started-DIY abstract art made simple!

So where did I start?  I found a few DIY’s, but being me, I don’t always ‘get’ it the first time (or second or 3rd).  I then found a few online classes and that helped me have a few light bulb moments BUT the single most important moment for me was the realization that if I hated my painting, I could just paint over it and build more ‘texture’ in the process, it made the whole intimidating process so much more accessible.  So this is how I did it!

ABSTRACT ART MADE SIMPLE | STEP-BY-STEP

-I pulled out my wood artboard and taped the sides with painters tape (I knew I wanted the finished piece to have the exposed birch wood sides)

-I found a few palette ideas I liked on Pinterest, I have a whole board for blush, peachy and nudes so plenty of palette muse there! I am a bit of a color-phobe, so my palette was very limited-2 whites, a dark umber brown (almost black), ochre, a deep orange that was blended into a dark peach and a sheer pink.

-In hindsight, I should have gessoed my board (this is just a way to prime your board for painting), but I just painted a couple coats of white acrylic on the wood and let dry.

-I started with ONE color at a time over my white surface. I squeezed a dollop of color and used a credit card (you could use an old library card, a palette knife, etc.) and I started to ‘scrape/paint’ with the card to create texture and ‘strokes’ (I deliberately tried to avoid too straight of edges, but if you wanted that look go for it). I would wait for the color to dry if I wanted just that one color, if I wanted colors to blend with each other I wouldn’t let them dry completely before adding other colors on top of the existing colors.

-After I laid down several colors and let them dry, I would add a wash of white over the painting, again with the credit card. Since the credit card method is a little unpredictable I would have some spots where I would press too hard and color from underneath would be revealed (I loved this!).

-I worked for a week in between toddler naps, in 10-15 minute increments which may seem like FOREVER to someone as impatient as myself but this allowed me to step back and assess my work and where I was going.  Also, it prevented me from rushing the white washes and just creating a muddled mess!

-I could have kept going, but at some point I wanted my kitchen countertop back so I stopped myself. I am super happy with the results and I can’t wait to try a larger piece and some backdrops for our photography!

In conclusion, I LOVED this project, it wasn’t the fastest to come together, besides the mess of acrylics, it was a pretty easy going and relaxed DIY. Please feel free to leave any questions in the comments, I’d be happy to answer them!

P.S. For those people that think a project like this may take a sale away from a ‘real’ artist, I am going to put my 2 cents in here and say this–maybe YOU dear reader are a ‘real’ artist and don’t know it yet, maybe a DIY like this is the key to opening up a whole new world of exploration for you and maybe you’ll find yourself a new career path or a new hobby or just make yourself a beautiful piece of artwork that you can be proud of. To everyone that just wants to be creative hats off to you!

//DIY ABSTRACT ART MADE SIMPLE |RESOURCES//

CLASSES

Large abstract with a credit card

Acrylic paint series with Lisa Solomon (this is super in depth, you don’t need this for this project but good if you want to keep going with this)

TUTORIALS

This is a GREAT step-by-step, color by color, stroke-by-stroke if you feel you need extreme hand holding

Easy Abstract Art step-by step

DIY Abstract with gold leaf

Super simple abstract art tutorial

5 step abstract art

An working artists shares his techniques

SUPPLIES

Gesso (for priming your art surface)

Acrylic paints student grade (if your supplies aren’t too precious it’s more likely to be used more freely)

Acrylic paints professional grade

Craft paints

Acrylic tubes used in piece (I used these) they are beautiful but super transparent and probably not made for large scale painting (but fun!)

Wood art board (these are awesome because you can just hang when you are finished, no additional framing needed: small / large

Pre-primed wood art panels (a large panel 36″ x 38″ is only $125USD!)

Miss Tristan B. is the co-creator of the world’s best + easiest product photography editing tool-Foto Rx | Shopkeeper’s Helper and one of the writer’s of this delightful blog. Her lofty goal here is to make this a creative resource repository and to inspire you to fall truly, madly, deeply in love with your life.

Inspired by :: Lourdes Sanchez | Wet on wet technique

Lourdes Sanchez wet on wet inspiration technique via besotted blog

The thing with me is I fall in love too easy. Not with people but with skills, a certain craft, that sort of thing. I get all weak in the knees when I see a new technique and then my research begins. Some things stick others go the way of the dodo, but I have been known to indulge almost all these interests at some point in my life. As a mom it’s near impossible to do that anymore, being that I am, still 2.5 years later, just really, really tired all the time. Lately though, I have been experimenting with watercolor in 10 minute increments, the clean-up isn’t too bad and most of the supplies are very portable. I will go more indepth into supplies, etc. in another post, but today I wanted to give you a little eye candy and some resources I found to inspire you even more so maybe you could try your hand at this technique.

Artist Lourdes Sanchez is just wildly talented, she is known for her large scale watercolors. I recently have fallen in love (again) with Ms. Sanchez’s ethereal abstract botanicals. With a little research I discovered that she utilizes a wet on wet watercolor technique to achieve the ghostly effects. Wet on wet is when you add your watercolor to a wet surface, it can be just water on your paper or another watercolor, the results as with most watercolor are unpredictable in the best way possible. The thing I am learning most about watercolor is that there is no such thing as control (sort of like life). For an individual like me that really likes to feel like I have a semblance of control, it is definitely a challenge to just let go (and perhaps a good exercise). We have linked to some resources below for you to explore Sanchez’s work further and delve more into the wet-on-wet technique. I’ll try to post some of my results when I get my watercolor paper order in, we hope to see yours too! Tag your images #inspoRx

//RESOURCES//

INSPIRATION

Lourdes Sanchez

Lourdes Sanchez Interview

BOOKS

Just add watercolor

TUTORIALS

Note, I like to keep an open mind when watching an artist technique tutorial. It may not be my exact vision, but I almost always learn something new!

Loose watercolor poppies

Loose roses, wet-on wet

Wet-on-wet technique for beginners

SUPPLIES

Good basic starter watercolor set here and here

Some great tube colors

I love a large round brush No. 14 is a nice size (but bigger can be even more fun)

Coldpress watercolor (for wet on wet you’ll want a paper that won’t easily warp)

Realistic painting effects in Photoshop

digital painting sam andy warhol reference via besottedblog

digital painting details

Michelle and I have been working on a project together which included painting, something I have little (to no) skill in. What I do have is an aptitude for Photoshop so I decided to take my meager painting skills and try my hand at digitally ‘painting’.  My first efforts were, ‘ok’, Michelle decided we needed a studio tablet, so she promptly ordered one and I started playing. That’s where my rabbit hole begins–one little thing leads to another, that leads to another… I realized quickly that I needed to find some artistic brushes that would mimic the strokes of a real brush. I downloaded some free ones but quickly found they didn’t look any better than the default ones. You can change settings for brushes to achieve all sorts of realistic effects (it’s a TON of research and trial and error), but I have been too chicken to, what if I change my brush settings and can never get them back again? Well, friends lucky for me (and you), a mad creative genius created a huge arsenal of Photoshop brushes and he pre-programmed ALL the settings so you don’t have to think you just have to use. I mean they are seriously goof proof. You can play with digital gouache (you know the type of paint that the internet is coo coo for? Think Rifle Paper co.), there’s even brushes that mimic pencils and charcoal and so many other art supplies that I was going a little batty deciding which set to choose from!  A little side note here, I am not very familiar with all the effects different ‘real’ art supplies achieve, so if you do know, you are going to have a little bit of a leg up on the individual that doesn’t, but experimenting for me is half the fun so I didn’t mind trying the brushes out to see the different effect. Btw, these work great for lettering as well!  So many possibilites!

I re-created this image of ‘Sam’ from Andy Warhol, because my daughter has been obsessed lately with a story about Andy Warhol’s 23 cats named Sam (a true story). I loved how charming and quirky the Sam portraits were so I tried the new brushes with Sam in mind. I am a total newbie at drawing and painting so I love to have something I can reference. Apprentices used to copy the masters to get down techniques, so I figured why not?  I am not good at tracing (super wobbly hand and there’s that whole attention span issue), so I just free-handed the outline with the tablet using my reference image as I worked. I did ‘paint’ Sam in using the mouse, because even though the brushes are specifically made to be used with a tablet, I wanted to see if you could get good results with a mouse (and you can!)  I think these brushes will open up a whole new creative world for me and are perfect for everyone from the hobbyist painter to the professional illustrator. If you had any interest in illustration, I think these are an amazing asset to add to your art supply arsenal.

//RESOURCES//

Realistic digital painterly effect brushes Gouache | Watercolor | Dry media (like pencils, chalk, crayons) | Mega Pack (a variety of digital art supplies to test)

Watch Kyle the maker of the brushes paint demo!

Wacom tablet entry level | intermediate level | pro level

Featured script font

Uncle Andy’s Cats

23 cats named Sam

Watercolor for designers (learned so much about shading in this easy to follow class)

Gouache for Illustrators class (nice to see gouache being demoed)

Free on-line life drawing classes

If you have any questions let us know in the comments!  Have you tried these brushes before?  Do you have any other recommendations?

P.S. You can get 3 months of Skillshare for .99 here. That’s plenty of time to take a TON of classes;)

Miss Tristan B. is the co-creator of the world’s best + easiest product photography editing tool-Foto Rx | Shopkeeper’s Helper and one of the writer’s of this delightful blog. Her lofty goal here is to make this a creative resource repository and to inspire you to fall truly, madly, deeply in love with your life.

ILLUSTRATOR LAURA AGUSTI INTERVIEW PART I

BESOTTED-WITH-LAURA-AGUSTI-iA few months ago, while dreaming up branding magic for a special client (we take on a few, very carefully chosen clients), we fell pretty hard for the idea of commissioning a one of a kind illustration that would perfectly embody the character of the brand. We had an enigmatic symbol in mind, rife with history and meaning, but in dire need of a modern make-over. It needed to feel organic, but, for ease of printing, had to be structured and tidy too. A daunting task for any illustrator to be sure!

We have a few talented artists on our radar that we were up to the task, but had our hearts set on Laura Agustí, an incredible talent out of Spain who I met on Instagram. Yep – Instagram. Luckily, our client fell head over heels for Laura too! We sent Laura an Instagram DM, exchanged emails, and the project was in motion. As predicted, Laura delivered an illustration that had our client (and us) swooning (gah!!- we can’t wait to show you!).

Laura is living the dream and struggle of a full-time artist, and because we are incorrigible snoops, we asked her for an interview. As you can see, she graciously obliged! This is our first non-lettering artist interview, but illustrators are close cousins to letterers right? We sincerely hope you’ll say hello!

Laura is prolific on Instagram, stop by to see more of her beautiful illustrations and peeks at her life in Barcelona with her precocious siamese cat.
Note: We’ve used good ‘ole Google translate for the English version of Laura’s interview – which we know can be flawed, so we’ve added Laura’s original answers (provided in her native Spanish) to the bottom of the post.

Read More

Story Starter No. 01

illustration by julianna swaney story starters via besotted blog

A lot of you may know (because we blabbed like crazy) that we took on the Everest-esque task of doing Nanowrimo and writing a novel in a month last November. It was an exciting and invigorating time for us and we were on an accomplishment high for a few months after. Sadly, we haven’t been writing since. We decided we needed a little push, an assignment perhaps? Some inspiration? Maybe you are feeling you need that too?  We wanted to launch a new series under Inspiration Rx (when you need a little shot of inspo), we wanted a way to get us writing, shooting, drawing or whatever medium it may be, just doing something creative. We feel it positively impacts our lives both personally and professionally. We will be posting weekly ‘Story Starters’, a little snippet to get the wheels churning, we would love it if you played along, all you need to do for the writing prompt is write a few sentences and if the muse calls keep going! For the photo or drawing prompt maybe the sentence will conjure up a visual? We do hope this becomes a fun exercise for you as well! You can add a link in the comments (site, instagram, pinterest) to what you may have done so we can all visit and give you a hip, hip, hooray for your efforts. Wish us luck on this new adventure, here is Michelle’s brave (and delightful) contribution!

Story Starter No. o1:

He arrived out of nowhere but came from somewhere…

… a home, possibly humble, but maybe not… perhaps he had loved a dog, a mother or a doddering great uncle, annoying cousins or the almond-eyed girl in the house next door. He gave no clues to his previous life, though there were times they saw him lost in thought, his eyes shimmering with shards of sorrow, exposed by the evening light.

We hope this inspires you to do something creative today!

illustration by julianna swaney