PINTEREST PINNING TIPS

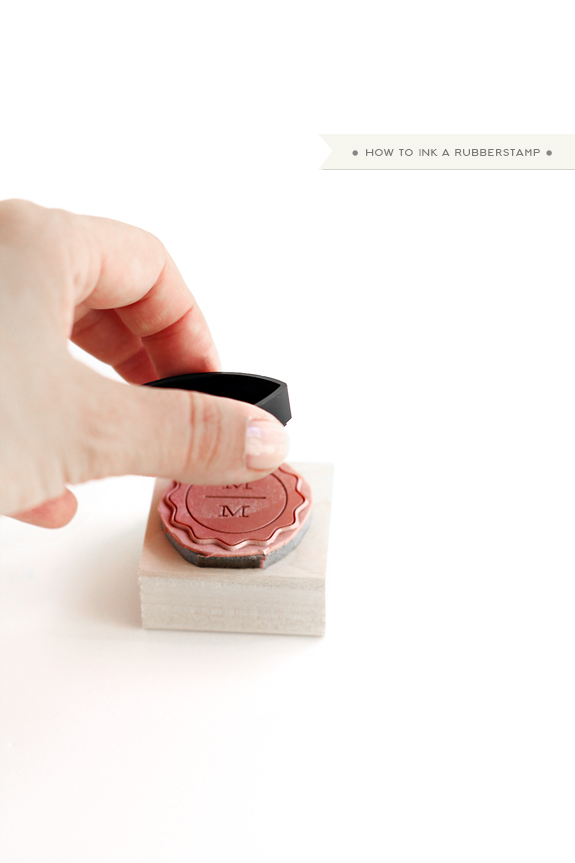
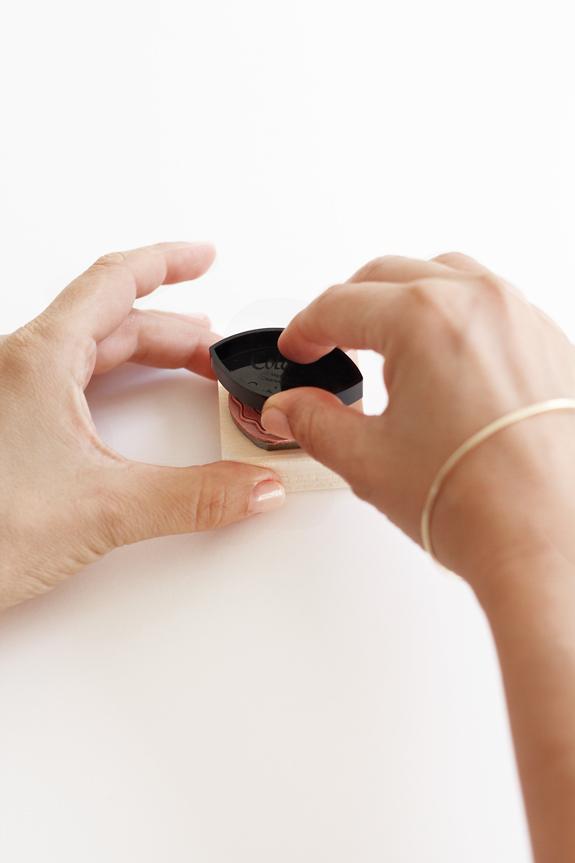
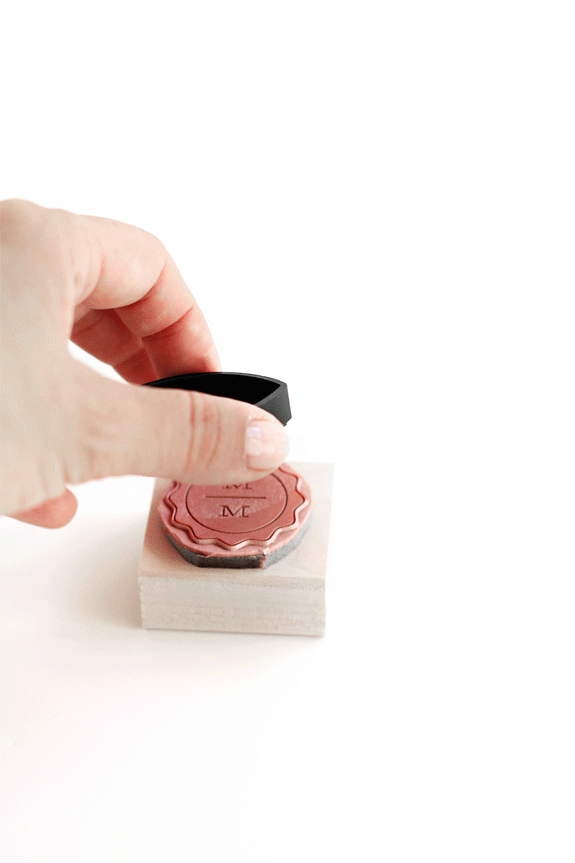
The other night I was in bed with the computer, my husband beside me watching the Olympics, at the commercial he looked over my shoulder and asked if I was going to ‘Pin’ that, that being some image that was on the screen.  I looked over at him and asked him how he knew what pinning was.  He said that he heard me explain it before and that it was proof that he listens to me, then he proceeded to ask me to pin a tennis racket that he thought was cool.  I explained to him that my pins were highly curated and there wouldn’t be a good place on my boards for his racket, “ok”, was his answer. It seems that my secret pinning passion is no longer secret, since the cat is out of the bag I figured that I would just be honest and let you know that I spend an inordinate amount of time that I could use sleeping on pinning, it’s both mindless and mindful, a relaxing pastime that I find infinitely more enjoyable than some of the other social media outlets.  I am very visual and therefore this medium works very well to satiate my need for constant visual stimulation. I am also an organization freak which Pinterest is able to sate that need as well.  I am sure a lot of you are pinning already, but for those starting out here are a couple tips–
  • You don’t need 8 million boards, it’s more manageable to have less and add to one category/board that makes sense.
  • If you pin a photo or artwork try to add the name of the artist and link in your description so they get full credit, don’t worry if you re-pin it will let the pinner know you re-pinned and others know where you re-pinned from.
  • If you re-pin one pinners pins a lot, give them some love by leaving a comment, it’s nice to know people appreciate your great taste.
  • If there’s a diy you like and you click and it takes you to the blog instead of directly to the blog post, maybe you can help a pinner out and pin to the exact post that way people lazy like me won’t give up and leave, your fellow pinner can find the diy right away.
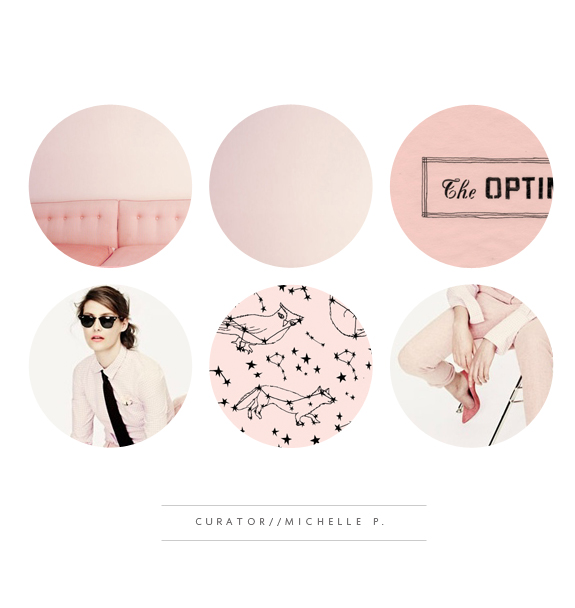
  • When you find someone’s pins you can’t get enough of why not follow them? I love feeling like I discovered a great new ‘curator’ like my pal Michelle P. she’s fairly new to pinning on a regular basis but her pins never disappoint.

I hope this helps and please feel free to ask me questions if you have any confusion about the above.  I included a link below that goes into more detail on getting started–

Pinterst::Getting Started

THE BEST WHITE INK FOR STAMPING– HANDS DOWN!

After many tests I chose the Color Box Frost White as the very best white stamp ink.  It’s the most opaque without resorting to embossing.  It also still allows for detail to show through, which I found key. It never left a perfect impression, but I don’t mind the handcrafted/rustic feel, if you want perfect I don’t think white stamp ink is there yet. The one thing I should mention is that ink reacts differently to each substrate (the item you are printing on) in this case cardstock. Some cardstock is more porous or has more texture, etc. so you need to test on your cardstock prior to getting started on your project. Practice is well, good practice in hand printing/stamping.  There’s a learning curve and it’s silly to believe you are going to be great right out the gate, I know this from experience, I thought ‘how hard could it be?’ I am full of crafting bravado, I quickly learned that I needed some practice. It’s not hard per se but there is technique involved. So there you have it my favorite white stamp ink. My next hand printing/stamping tutorial will be on how to center a stamp so stay tuned!

PRODUCT PHOTOGRAPHY::AVOIDING COLOR CASTS


And because I love you but haven’t had a chance yet to put together a proper tutorial I will try to add a product photography tip to for those that have been as frustrated as myself in your product photography journey.

To avoid odd color casts (green, yellows, blues, magenta, etc.) on your white backgrounds when shooting in natural light make sure you are not near anything that will throw a color tone on your background. What am I talking about? I am talking about things like grass or trees from outside, brightly painted walls and even the clothing you are wearing (I try to wear a white t-shirt when shooting).  At my old studio /dining room I

And because I get asked this about 200 times a day (I send out a lot of emails, no wonder I haven’t taken over the world yet, hmmm) and it has only taken me four years to add this (and I promise I will add it as an easy reference link in the near future), this is what I shoot with:

For my product shots I mostly use my 50mm 1.4 lens, it’s not the best lens for product photography (but not the worse either).  I have been saving up my pennies for the 100mm macro.  I have rented that lens from here and it not only shoots beautiful product shots but is an excellent portrait lens too. If you only have the 18-55mm kit lens (usually comes with your camera), don’t fret that lens actually has nice up close capabilities but you will want to make sure your set-up is well lit as the aperture doesn’t open very wide. If you want to upgrade to a good prime lens the nifty 50/50mm 1.8 is usually around $100 and is such a great deal. I do use a tripod, as much as I feel it’s a hassle, I find it a necessary evil. I have mentioned the Lowell Ego lights for years, I haven’t tried any other lights but I promise that no one can ever tell the difference in my photographs from the ones that I’ve taken in natural light versus the ones I have shot in a darkened room with the Lowell ego lights. I have found the least expensive place to buy them is on Amazon and that’s true for all the products above, it’s a competitive marketplace so you will find multiple prices for the same product and have the added security that if you are unhappy with a purchase they will take good care of you. Sheesh, I sound like a commercial.  I do want to try the large continuous lights but they aren’t in my budget.  I went to a workshop hosted by sweet Dani, the woman that hosted it had an Etsy shop for vintage clothing she had the continuous lights and a permanent mini photo studio set-up at all times; her shots + set-up made me coo coo with envy.

HOW-TO INK A RUBBERSTAMP (PROPERLY)

Many of my clients for Besotted Brand are fairly novice to the art of hand stamping.  Maybe they have done it in passing in middle school or had an eccentric aunt whom was a rubberstamp hoarder/craft maven that had no interest in sharing her ‘secrets’, but they really haven’t played much with the idea of using a rubberstamp in their d.i.y. life since.  My stamps are on the diminutive side which also means that the traditional stamp pad would engulf the design and perhaps be more messy than one would like.  I found the best way to ink the stamps is to take the ink to the stamp.  This is good practice two fold 1) I can make sure my entire stamp design is inked and 2) I can control the amount of ink on my stamp.  You want to have a nice even layer, not too thick, not too thin. I will do a whole post on ink types another time as that seems to be another can of crafting worms but for now let me concentrate on the inking.
Pressure is everything in hand stamping and that includes the inking of the stamp, you need a light hand but not so light as to not transfer any ink. I just go around my stamp with the ink pad making little taps–lifting + inking until I have the entire design covered.  This may seem more tedious than just plonking your stamp on a stamp pad, but the results outweigh the inconvenience. You can achieve truly professional printing results by taking the extra time.  With any new skill don’t expect to be the greatest hand printer on your first try.  It takes practice, lot’s of practice. With any printing method your results will vary with each ink (even color) and the substrate you are printing on, not to mention the surface.  Don’t expect awesome results if you are stamping your blank cards on top of carpet, but I didn’t need to tell you that, right?  I like to think of my stamps as miniature printing presses, it’s as labor intensive as letterpress, with a smaller footprint + less of a learning curve. You can achieve beautiful results and you are only limited to your imagination.  So go out there and get to printing! If you have any questions feel free to send me an electronic mail, I always love hearing from you!