
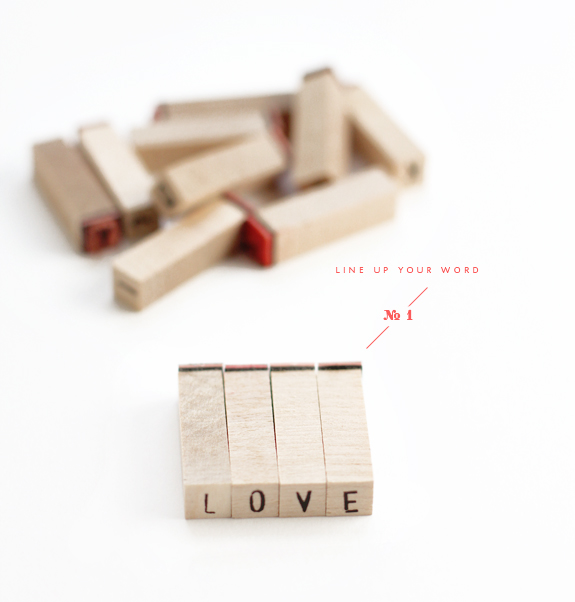
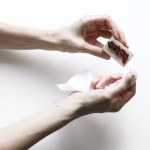
 Happy Valentine’s Day to you! I have received a ton of requests on tips on how to best use alphabet stamp sets and I am happy to oblige. I love alphabet stamps (or ‘alpha’s’ as they are also known). My biggest tip before I get further into this tutorial is if you start using these sets a lot then you might want to invest in more than one set of the same alphabet, it will make life so much easier. If I needed a duplicate letter in my word above, say I wanted to spell ‘lovee’ then I would have to print what I have above then go back in with the ‘e’ and there’s a major chance (if you are me) that it will come out all crooked and wonky and ruin what I was working on. Granted, using alphabet stamps does not give you a perfectly straight word, by the nature of the stamping medium you will have very organic/rustic results, but you probably still want some control of the effect, right? Step. 1-I start out by finding the letters I would like to use for my word (like the example above), once I have the word I want I set the stamps as close and straight as possible to make it easier for Step. 2.
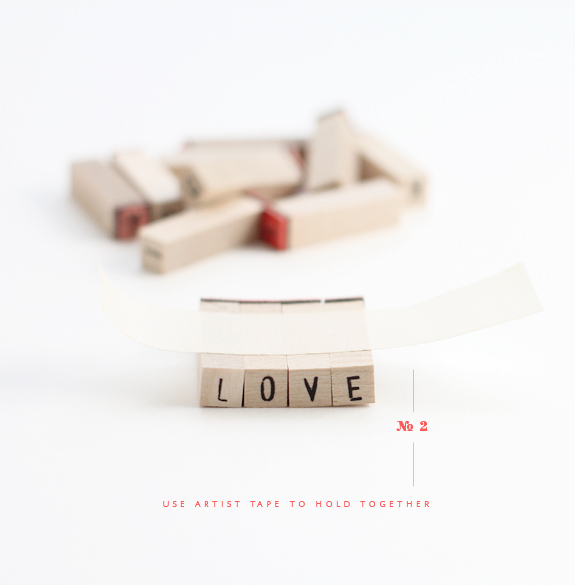 Step 2-I cut a piece of artist/drafting tape long enough to wrap around the entire word. This is important, if your tape is not long enough the stamps can bow, or become misaligned making this whole process futile. I use artist/drafting tape because it is re-positionable and is easy to remove and does not leave a sticky residue. You could also try washi tape which also has a low tack adhesive and in a bind you could use masking tape, but it’s a bear to remove from your stamps so I wouldn’t recommend it.
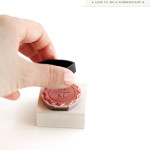
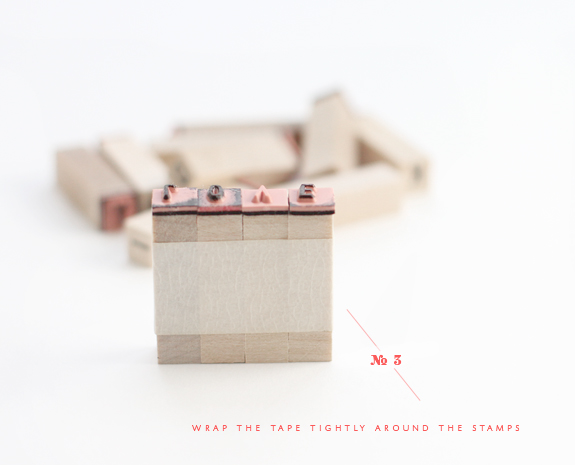 Step.3-Wrap the tape firmly around the stamps and get to printing! I tried all sorts of techniques and this is by far the easiest + most convenient way to work with the alphabet sets. If you have any other questions or requests feel free to email me or leave the request in the comments!
Miss Tristan B. is the proprietress of Besotted Brand and the writer of this delightful blog. She believes hand stamps are akin to owning miniature printing presses.

Oh! Didn’t think of that! Great!
perfect for today…have a beautiful valentines!
perfect! xo
Brilliant. This is so helpful. No wonder mine are always so wonky. Thank you! I have now assembled some of the basic calligraphy supplies. I just need to sit quietly and practice. I am looking forward to it. You have been a major source of inspiration and encouragement. Happy Valentines Day!
This is seriously brilliant – and so easy!
Lealu, yea, glad you like!
Happy Valentine’s to you too Miss Susan!
Thanks Brandi, brilliant is a very high compliment;)
Kathy I would think you would know this! I am so thrilled that I actually taught a fellow ‘stamper’ a new trick, what an accomplishment! My words were always so wonky until I thought if this, use the tape I mentioned, it is SUCH a pain to try to pry the tape off if you use any other type of tape, seriously.
I am THRILLED you are trying the calligraphy out! It’s such a wonderful hobby, it’s relaxing, inexpensive and there’s such a sense of accomplishment!
Thank you Rebecca:)
i love love love this! the way you shot the how to photos (and all your other photos,btw) are just gorgeous. you are a wealth of information! xoxo
Ah, thank you Maybelle! I can’t wait to shoot your beautiful lettering one day!
L O V E this! genius- never thought to try this method!
Ah, Ginny, I can’t wait to meet you in person and I can share all my top secrets with you;)
Brilliant! I’ve been wanting to get some alpha stamps so will definitely use this tape technique! Thanks so much for sharing! :)
What an “aha” moment I got when I saw this tutorial. I’ve avoided using my alphabet stamps because
I can never get them lined up:( I wonder if I took some of the sticky off (apply the tape on my clothes then remove it) if I could use masking tape? Going to go try it now!
Thanks
Mikki I am so happy! I had a hard time with the masking tape and any other tape that was too stick as it was hard to remove but maybe if you put a piece of cardstock at the end so you easily rip it off when you are done? Just a thought, have fun:)
What a great tip!
The trouble I get when stamping is sometimes the square that encases the letter appears on my prints which looks terrible. How can I stop that?
Hi Jessica, that happens for a few reasons, one is how you ink the stamp. I will include a link below on that, if you take the pad to the stamp you can ink only on the letters and not get on the sides (this will help a lot), especially if you use an ink pad that is smaller and gives you more control with the smaller alphabet stamps.
Also, try to apply firm but not too much pressure on the stamp (don’t put your body weight into it) and lift straight up, this will leave a cleaner impression.
http://besottedblog.com/how-to-ink-a-rubberstamp-properly
thank you for these tips. I have been scrapbooking and doing crafts forever and never thought of taping the blocks into words. amazing!!!
Marilou, that’ so exciting to hear! I love when I can show even the most craftiest a new trick or two:)
I have had alphabet stamps for months and not used them because my first attempts were so wobbly? What a great idea to fasten tape round them! So simple!
P.s I have just found your blog via Mrs.French and I love it!
Sharon, when I first started using them I actually thought something must be wrong with me that everyone knew how to do this but me, lol! I am glad I can help, just remember make it a take that you can take off easily or it’s SUCH a hassle! I love Mrs. French she’s one of my all time faves!
Oh my goodness! This is one of those head-slapping moments where I said, “Why the heck didn’t I think about doing that?!” Thank you, thank you, thank you!
So happy you like it Susan!
What a great tip! I didn’t even think to do that. You have just saved me so much time!
Also try a rubber band!
Hey I was wondering what I should do if the word I use has two of the same letter, such as HAPPY?
HI Liz, that’s a great question and the only good answer is to own more than one set. I own multiples of all my alphabet sets:)
Hello! Lovely tutorial! I was wondering what brand the alphabet stamp was? It’s exactly what I’m looking for? Thank you so much! xxx
Hello Janine! Thank you for the visit! I used to sell these sets in my stationery shop which I closed down. There are plenty of wonderful ones at Michael’s and Joann’s!